When the summer heat makes your lettuce bolt and your spinach give up, okra is just getting started. This heat loving powerhouse thrives in sweltering conditions and rewards you with a steady stream of crisp pods perfect for stews, stir fries, and crispy snacks. Grown around the world, okra is a staple of Southern cooking, North African stews, and Indian curries alike.
Key Takeaways
- Best planting time: 2-3 weeks after your last frost when soil reaches 65°F
- Spacing: Plant seeds 12-18 inches apart in rows 3-4 feet apart
- Harvest timing: Pick pods when they're 3-4 inches long and tender
- Growing season: 50-65 days from seed to first harvest
- Common challenge: Pods get tough quickly if left too long on the plant
Table of Contents
Want to know the best time to plant okra in your area?
Try the Universal Planting Calculator to get personalized planting dates for okra and many other crops based on your location and last frost date.
When to Plant Okra
Okra needs warm soil and hot weather to thrive. Plant seeds directly in the garden 2-3 weeks after your last frost date, when soil temperature consistently stays above 65°F and nighttime temperatures stay above 55°F. In most areas, this means late May to early June.
Climate zones: Okra grows best in USDA Zones 7-11. If you're in cooler zones (6 and below), try starting seeds indoors, using raised beds for faster soil warming, or growing in polytunnels to extend your season. Clear poly tunnels or landscape fabric can help warm the soil in cooler areas.
You can start seeds indoors 3-4 weeks before transplanting, but okra doesn't like root disturbance due to its deep taproot. Direct sowing works better in most cases.
Safety First: Handle with Care
Always wear gloves and long sleeves when handling okra plants. The leaves and stems are covered in small spines that can cause skin irritation. This irritation is harmless but uncomfortable.
Soil Requirements
Okra grows in almost any soil type, but it performs best in well-draining soil with a pH between 6.0-7.0. Sandy soil with a slightly higher pH (closer to neutral) can improve growth. The plant tolerates poor soil better than most vegetables, making it perfect for challenging garden spots.
Soil preparation: Till the soil to a depth of 12 inches and mix in 4 inches of compost or slow-release fertilizer. This enrichment significantly improves yields according to experienced gardeners.
Work compost into the planting area if your soil is heavy clay or very sandy. Good drainage matters more than rich soil for okra success.
Companion planting tip: Okra grows well alongside peppers, eggplant, and melons, but avoid planting it near sweet potatoes or other heavy nitrogen users that might compete for nutrients. Ensure adequate sunlight and airflow between plants.
Want to make your own compost? See our step-by-step composting guide for easy, effective methods.
Okra Growing Snapshot
| Requirement | Details |
|---|---|
| Soil Temp to Plant | 65°F or warmer |
| Days to Harvest | 50–65 days |
| Sunlight | 6–8 hours |
| Spacing | 12–18" between plants |
| Ideal Pod Size | 3–4 inches |
How to Plant Okra: Direct Sowing vs Starting Indoors
Direct Sowing (Recommended)
- Prepare seeds: Soak seeds overnight in warm water to speed germination
- Plant depth: Sow seeds 1/2 to 1 inch deep
- Spacing: Space seeds 4-6 inches apart, then thin to 12-18 inches between plants (okra plants get large, so don't underestimate the space they need)
- Row spacing: Leave 3-4 feet between rows for mature plant size
Starting Indoors
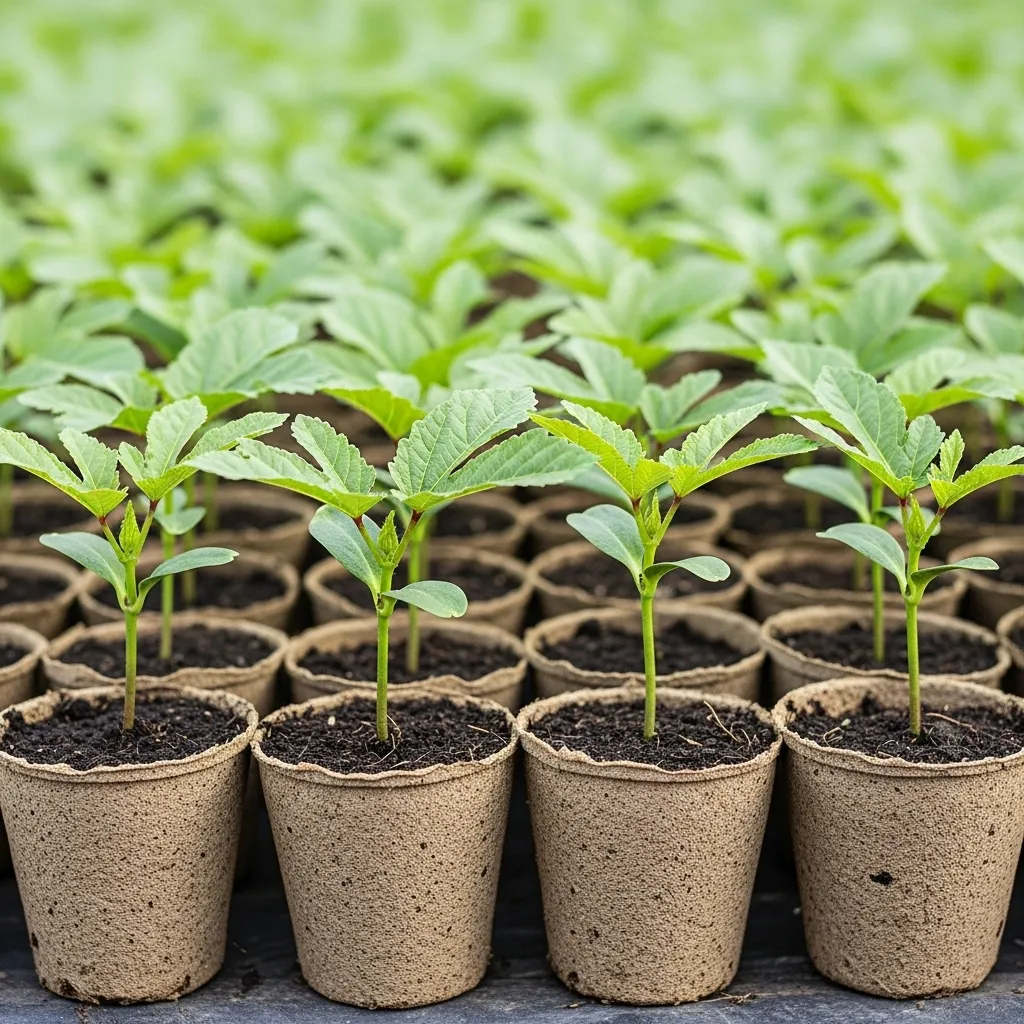
If you start seeds indoors, use biodegradable pots to minimize root disturbance. Plant 3-4 weeks before your transplant date and harden off seedlings for a week before planting outside.
Okra seedlings started in biodegradable pots — perfect for transplanting with minimal root disturbance.
Interested in starting other warm-weather crops from seed? Read our eggplant seedling guide for more tips.
Care and Maintenance
Watering
Water deeply once or twice per week rather than daily light watering. Here's what to focus on:
- Deep watering: Okra needs about 1 inch of water weekly, including rainfall
- Morning watering: Water in the morning to allow foliage to dry before nightfall, reducing the risk of rot
- Drought tolerance: The plant becomes more drought tolerant as it matures, but produces best with consistent moisture
- Signs of water stress: Wilting during the hottest part of the day, or pods that stay small
- Container growing: Regular watering is crucial as containers dry out quickly
Fertilizing
Okra is a heavy feeder and benefits from regular nutrition. Apply a balanced fertilizer (10-10-10) when planting, then side dress with compost or fertilizer after pods begin to form for prolonged harvests. A continuous supply of nitrogen supports ongoing pod production.
Mulching
Apply 2-3 inches of organic mulch around plants to retain moisture and suppress weeds. Keep mulch a few inches away from the stem base to prevent pest problems. This is especially important in hot climates.
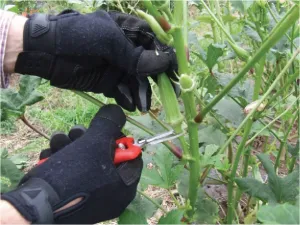
Pruning
Most okra varieties don't need pruning, but you can top tall plants at 5-6 feet to make harvesting easier. Some gardeners recommend pinching off growing tips when plants reach 24 inches to encourage branching and higher yields. Topping redirects the plant's energy from growing taller into producing more side branches and flowers.
Vertical Growing
Taller okra varieties can be staked to save space and support heavy branches, especially in smaller gardens or containers. Use sturdy stakes and tie branches gently to avoid damage.
Container and Raised Bed Growing
Containers: Okra can be grown in large pots, but use the biggest containers possible—at least 5 gallons—to accommodate the deep taproot. Ensure ample space and deep soil, and remember that regular watering is crucial as containers dry out quickly.
Raised beds: Okra does exceptionally well in raised beds with rich, well draining soil and full sun exposure. The improved drainage and soil warming make raised beds ideal for okra growing.
How and When to Harvest Okra Pods
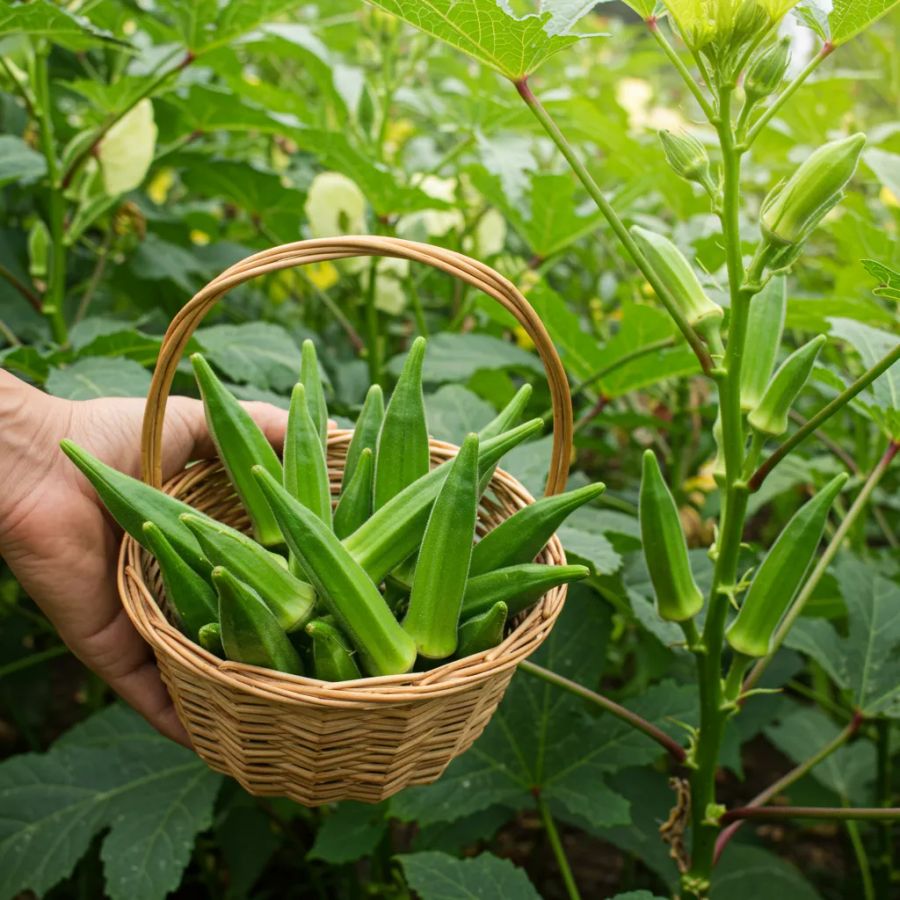
This is the most important rule for growing okra. Pick okra pods when they're 2-4 inches long and still tender. Test by gently bending the tip - it should snap easily if the pod is ready.
Critical timing: Pods can go from too small to overripe in just 24 hours during peak season, so vigilance is needed. A pod can go from tender to woody in just a day or two during hot weather.
Harvest frequency: Check plants daily during peak season and harvest every 1-3 days. Frequent picking encourages more blooms and pods, while removing over-mature pods keeps production high.
Morning harvest: Pick pods in the morning when they're crisp and full of moisture. Most okra plants are spiny, so always wear gloves and use clippers or a sharp knife to harvest safely.
Harvest okra pods when they're 3–4 inches long for best taste and texture.
Common Problems
Tough, Fibrous Pods
Cause: Pods left on the plant too long
Solution: Harvest every 2-3 days when pods are 3-4 inches long
Poor Germination
Cause: Cold soil or old seeds
Solution: Wait for warm soil (65°F+) and soak seeds before planting
Slow Growth
Cause: Cool weather or too much nitrogen
Solution: Wait for consistent heat; reduce nitrogen fertilizer
Pest Issues
Cause: Corn earworms, aphids, or flea beetles
Solution: Use row covers early in season; spray with insecticidal soap for aphids
Transplant Shock
Cause: Root disturbance when transplanting seedlings
Solution: Transplant very gently, use biodegradable pots, or stick to direct sowing
Tall, Leafy Plants with No Flowers or Pods
Cause: Too much nitrogen fertilizer, not enough sun, or inconsistent watering
Solution: Ensure the plant gets 6-8 hours of direct sun. Stop using nitrogen heavy fertilizer and switch to one higher in phosphorus. Water consistently.
Disease and Pest Prevention
Cause: Overhead watering, overcrowding, or poor air circulation
Solution: Keep the bed weed-free, avoid overhead watering, and ensure adequate spacing between plants for good airflow
Variety Recommendations
For beginners: 'Clemson Spineless' - reliable, productive, and widely available
For small spaces: 'Baby Bubba' - compact plants, full-sized pods
For unique color: 'Red Burgundy' - striking red pods and stems
For extended harvest: 'Emerald' - slow to get fibrous, longer harvest window
Getting Started This Season
Okra rewards patient gardeners who wait for warm weather. Start by choosing a sunny spot in your garden with decent drainage. If you're in a northern climate, consider starting seeds indoors or choosing a quick maturing variety like 'Baby Bubba'.
The key to okra success is consistent harvesting once pods start forming. Set a reminder to check your plants every few days, and you'll have tender pods for cooking all season long.
Growing okra connects you to a deep history of Southern and global cuisine. The key is simple: give it heat, give it sun, and harvest it consistently. The reward is more than just a vegetable; it's the essential ingredient for a perfect gumbo, the star of a crispy fried side dish, and a sign of a truly successful summer garden.
Ready to give okra a spot in your garden this summer? Pick a sunny patch, plant after the frost, and harvest often — then let us know your favorite way to cook your first batch of pods!
Frequently Asked Questions
Can I grow okra in containers?
Yes, but use the biggest containers possible at least 5 gallons—to accommodate okra's deep taproot. Regular watering is crucial as containers dry out quickly.
How long does okra keep producing?
Plants produce pods from midsummer until the first frost, typically 10-12 weeks.
Why are my okra pods slimy?
That's normal! The slime (mucilage) is what makes okra perfect for thickening soups and stews.
What's the best way to cook okra to avoid the slime?
The 'slime' (mucilage) is reduced by high heat and acid. Cooking okra whole or cutting it into large pieces and roasting, grilling, or frying it at a high temperature will result in a crisp, non slimy texture. Adding it to acidic dishes with tomatoes also helps.
Can okra be grown vertically?
Yes, taller okra varieties can be staked to save space and support heavy branches, especially in smaller gardens or containers.
How do I save okra seeds for next year?
Simply leave some pods on the plant to mature and dry completely until they're brown and papery. Collect the seeds inside for easy storage and planting next season.